In this article, I will show you how to create a simple C# Web API using ASP.NET and Entity Framework code-first approach.
Project
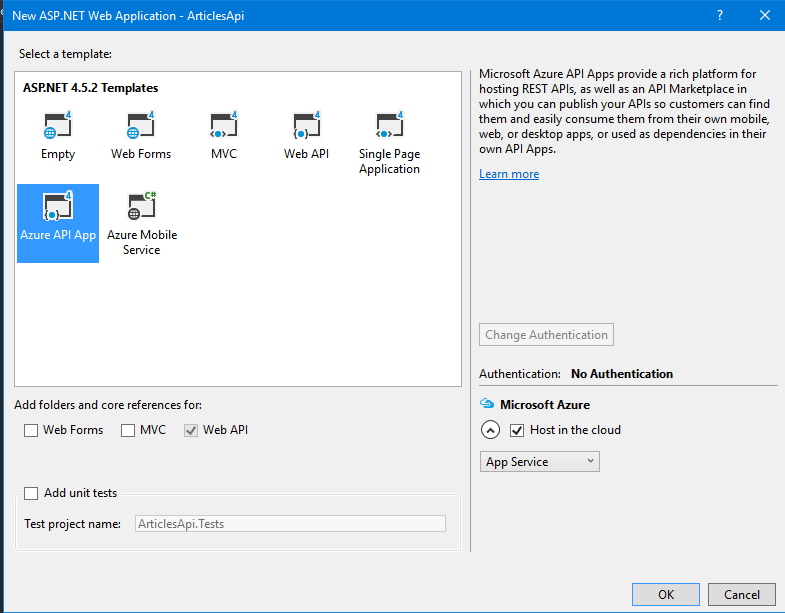
Create a new ASP.NET project and select the Azure API app template. Check Host in Cloud option.
Models
Create a new class library and data models that suit your project. In this case, I’m going to create two models. The first model will contain information about an article.
public class Article
{
    public int Id { get; set; }
    [Required]
    public string Title { get; set; }
    [Required]
    public string Description { get; set; }
    [Url]
    [Required]
    public string Image { get; set; }
    [Url]
    [Required]
    public string Url { get; set; }
    [Required]
    public DateTime? PublishedDate { get; set; }
    public int SourceId { get; set; }
    public Source Source { get; set; }
}
The second model will contain information about an article’s source and also a collection of all its articles.
public class Source
{
    public int Id { get; set; }
    [Required]
    public string Name { get; set; }
    [Url]
    [Required]
    public string Url { get; set; }
    public virtual ICollection<Article> Articles { get; set; }
}
Controllers
Build the project, right-click on a Controllers folder and then click Add -> Controller. Select Web API 2 Controller with actions using Entity Framework.
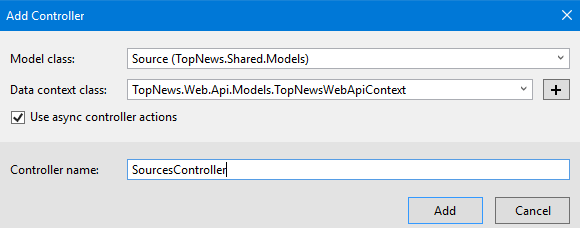
- Select Model class
- Click
+to add new Data Context class if not exist - Check
Use async controller actions - Click
Add - Build project
- Repeat steps 1-5 for each model.
Database
Open Package Manager Console and run commands:
Enable-Migrations
Notice that Migrations/Configuration.cs class had been created. There is a method called Seed, and it’s used to insert or update data during the initialization process of a database.
Now, run:
Add-Migration Initial
and:
Update-Database
..your database, has been successfully created!
Publishing API
Right-click on API project, and click Publish. Validate your server connection and click Publish.
Swagger
In App_Start/SwaggerConfig.cs uncomment:
/*
     })
 .EnableSwaggerUi(c =>
     {
*/
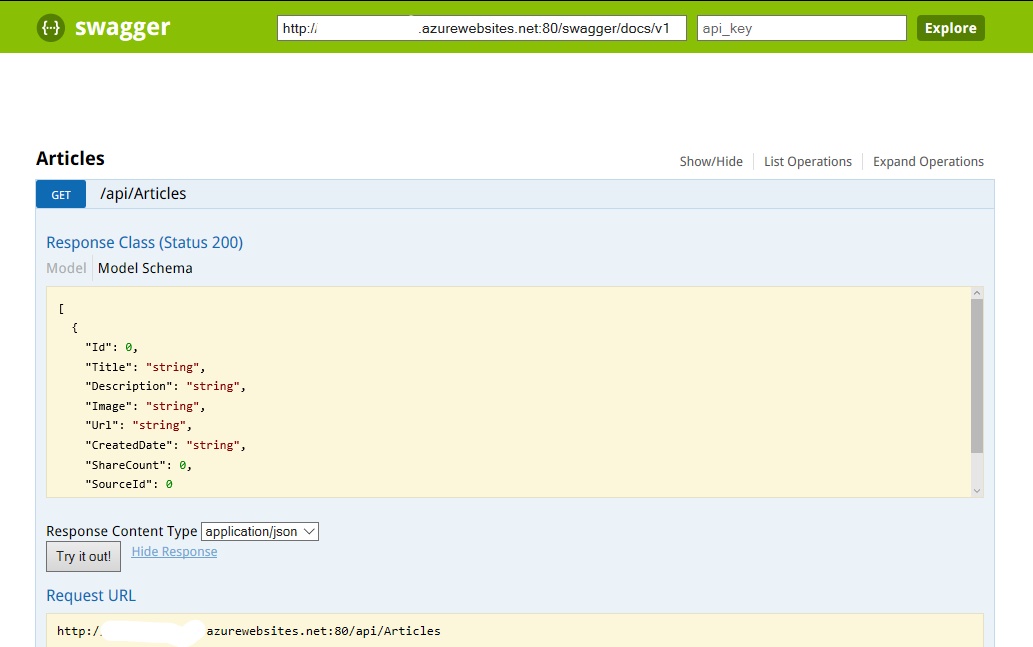
Now add /swagger to your API address to access automatically generated documentation with an ability to process client calls against your API.
Data Transfer Objects
As you can see, we want to achieve one-to-many relationship, where one source can have multiple articles. However, we also need to display Source property in each article, which will cause an infinite loop. For this reason, we have to create new models called Data Transfer Objects (DTOs), which will contain only properties that we want to appear in the produced JSON file.
So, if we want to retrieve all sources, we can create a new Data Transfer Object without a collection of its articles or with a collection of article data transfer objects.
public class SourceDTO
{
    public int Id { get; set; }
    public string Name { get; set; }
    public string Url { get; set; }
}
var sourceDto = new SourceDTO()
{
    Id = source.Id,
    Name = source.Name,
    Url = source.Url
};

return Ok(sourceDto);
Conclusion
Unfortunately, casting data transfer objects manually every single time is not the best solution when you need to have multiple DTOs of your model. Therefore, I would recommend you to take a look at AutoMapper library, which can make your work easier.
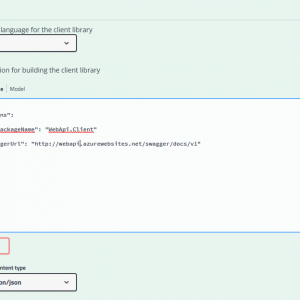
Since we have enabled Swagger documentation, in the next article I will show you how to generate a library which will provide types and callers for your API.
Stay tuned.